

In this tutorial I’ll show you how to launch a completely sandboxed macOS application on system startup written in Swift.
Update: you should simply add the LaunchAtLogin library to your project. It’ll take care of everything and it has some other cool utility features.
Project setup
Let’s start this tutorial by creating a new Xcode project with a macOS app template. Name it for example MainApplication, use storyboards and of course select Swift as the default language, we don’t need tests for this project at all.
Now that we have the main application target, there is this nice little function available called SMLoginItemSetEnabled. With that function you can register an application bundle identifier to auto start when the user logs in, but you can not register your own app identifier. Sounds crazy, huh? 😜
You can register a bundle identifier embedded into your main application to get auto-launched by the system. To do this you will have to create a new launcher application which will be launched later by your main application.
You also have to code sign your application with your Developer ID, otherwise it won’t start after you log in to macOS. Sandboxing is a crucial part of the process, so make sure that you follow every instruction carefully.
Targets & configurations
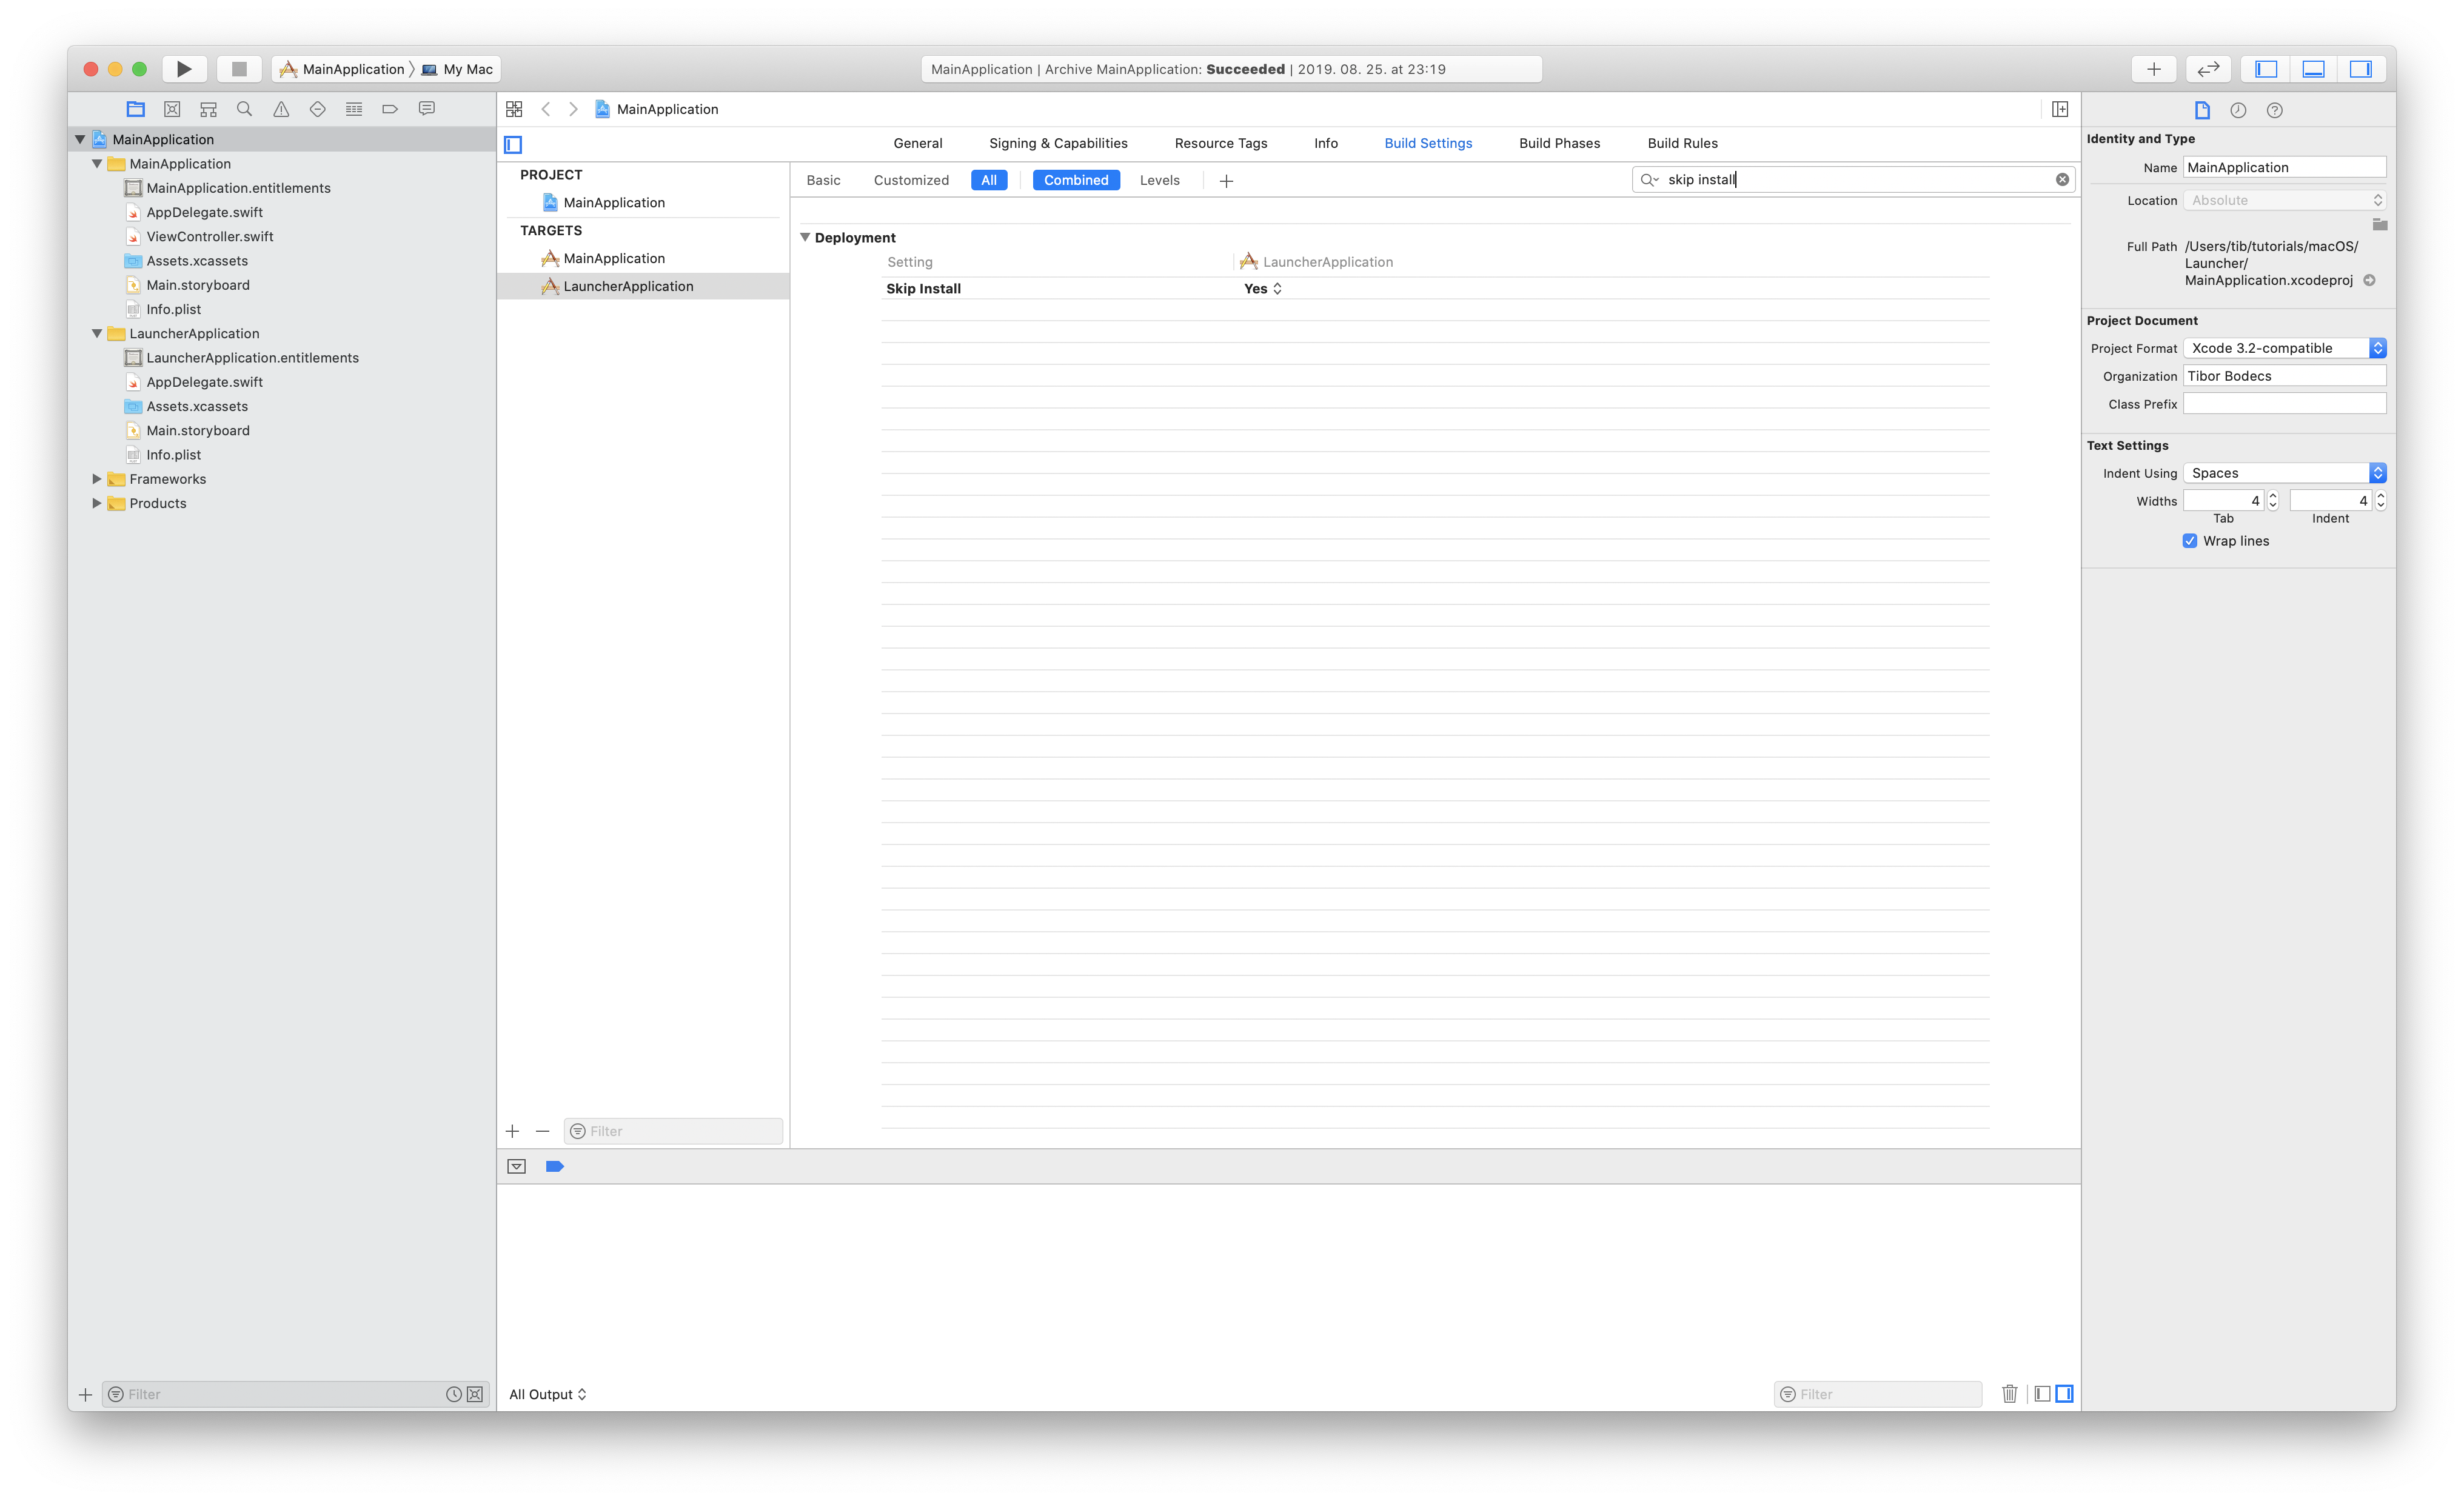
Create a new target inside your current project. Name this new target for example LauncherApplication. Enable sandbox and code signing for both targets (main and launcher apps) under the Signing & Capabilities tab. For the LauncherApplication target in the build settings set skip install to yes.
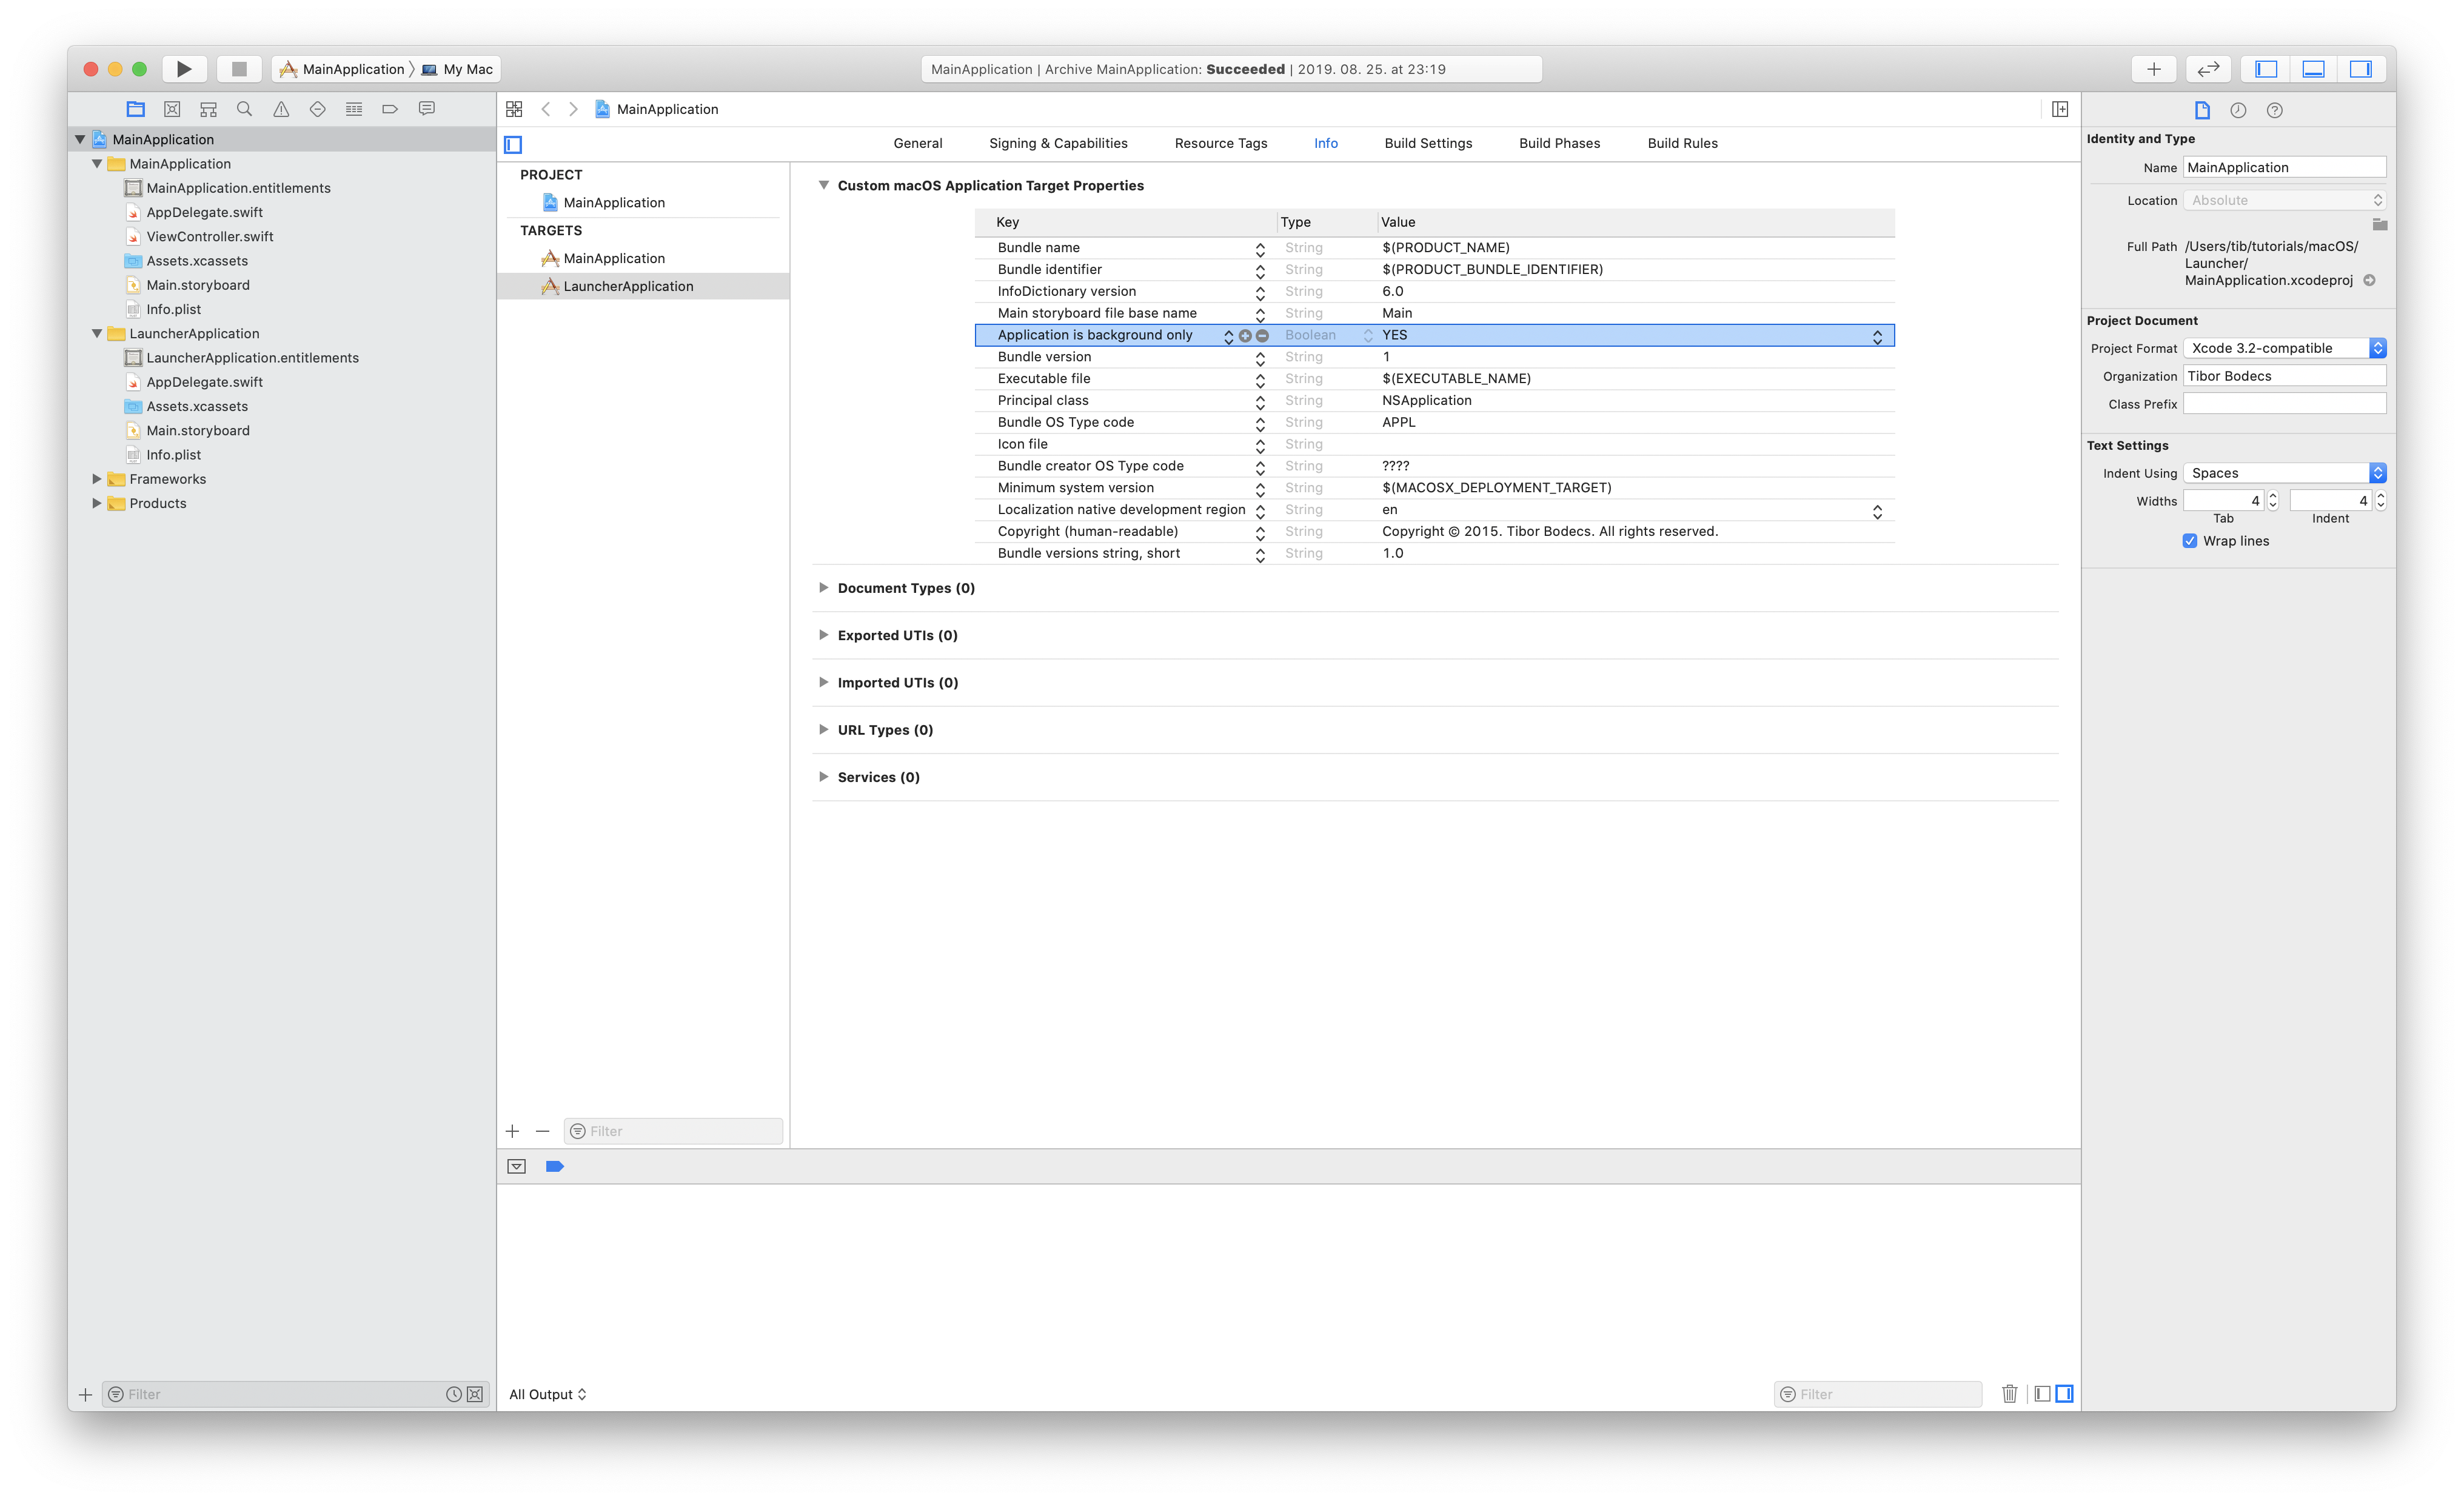
For the launcher app add a new entry to the Info.plist file: Application is background only with the value: yes. This will set your application as a background app, we don’t really need user interface for a launcher tool, right?
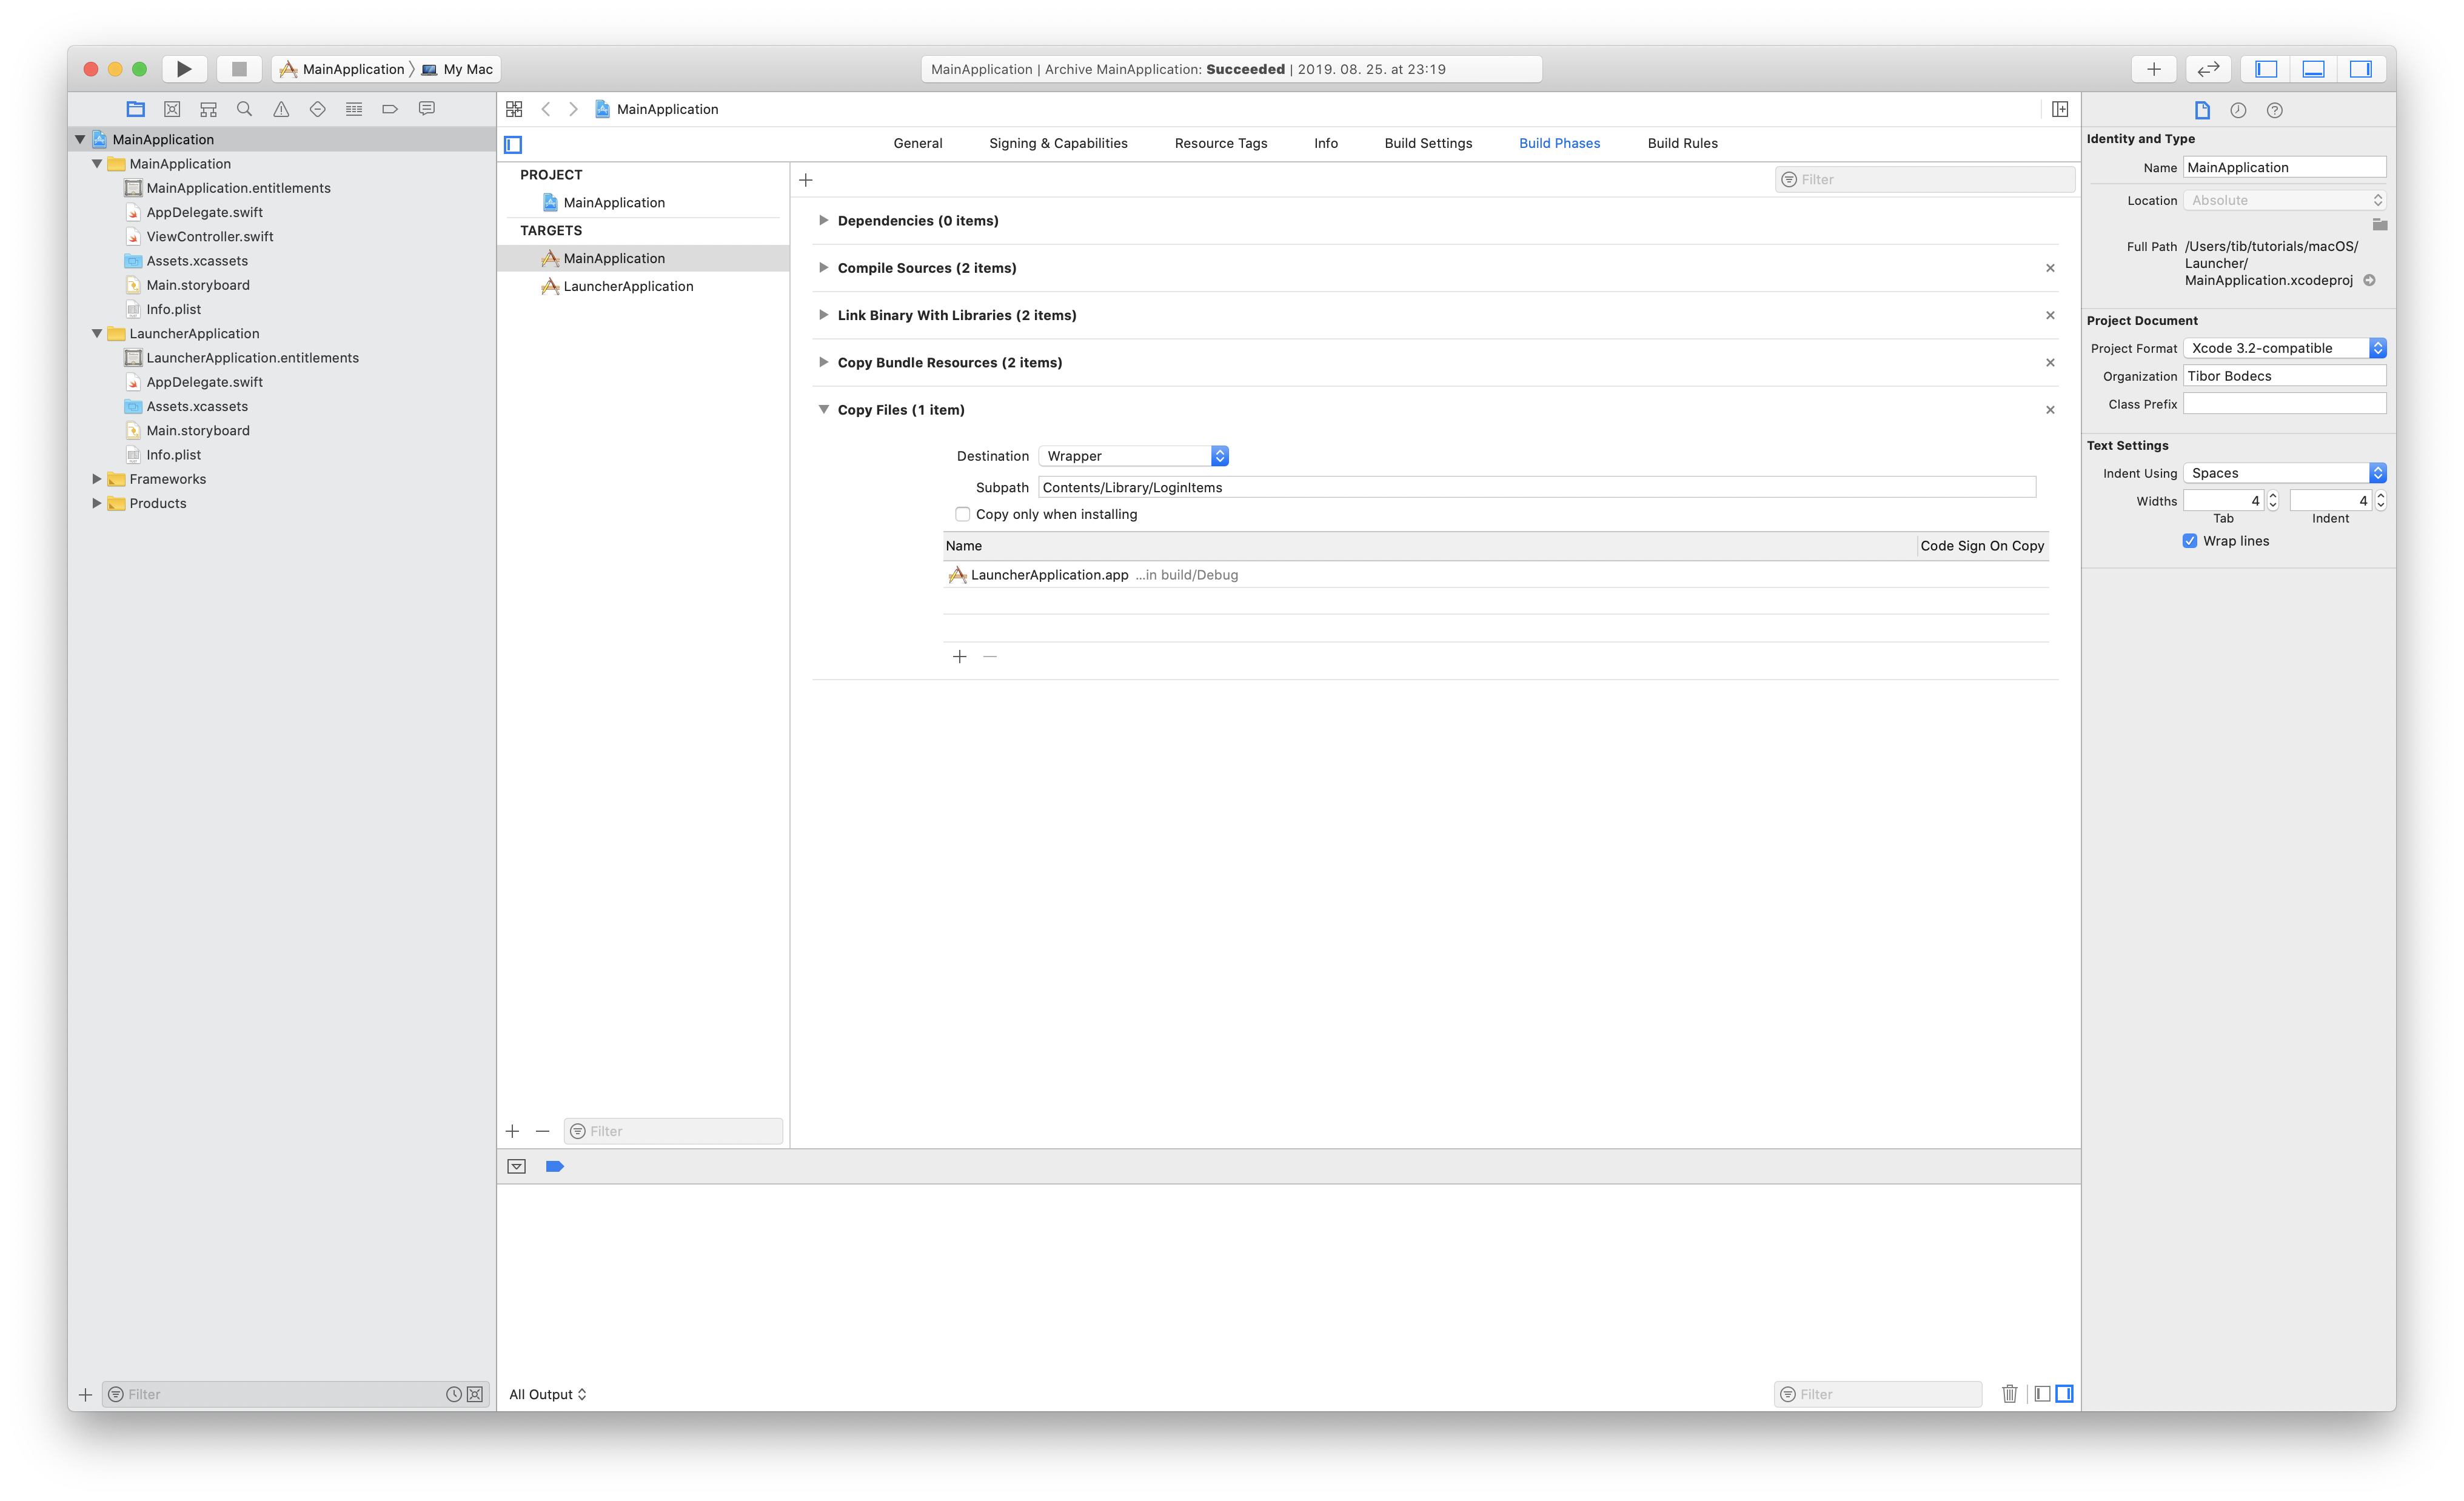
Add a new copy file build phase to your main application target to copy your launcher application into the bundle. The destination should be wrapper and the subpath should be Contents/Library/LoginItems.
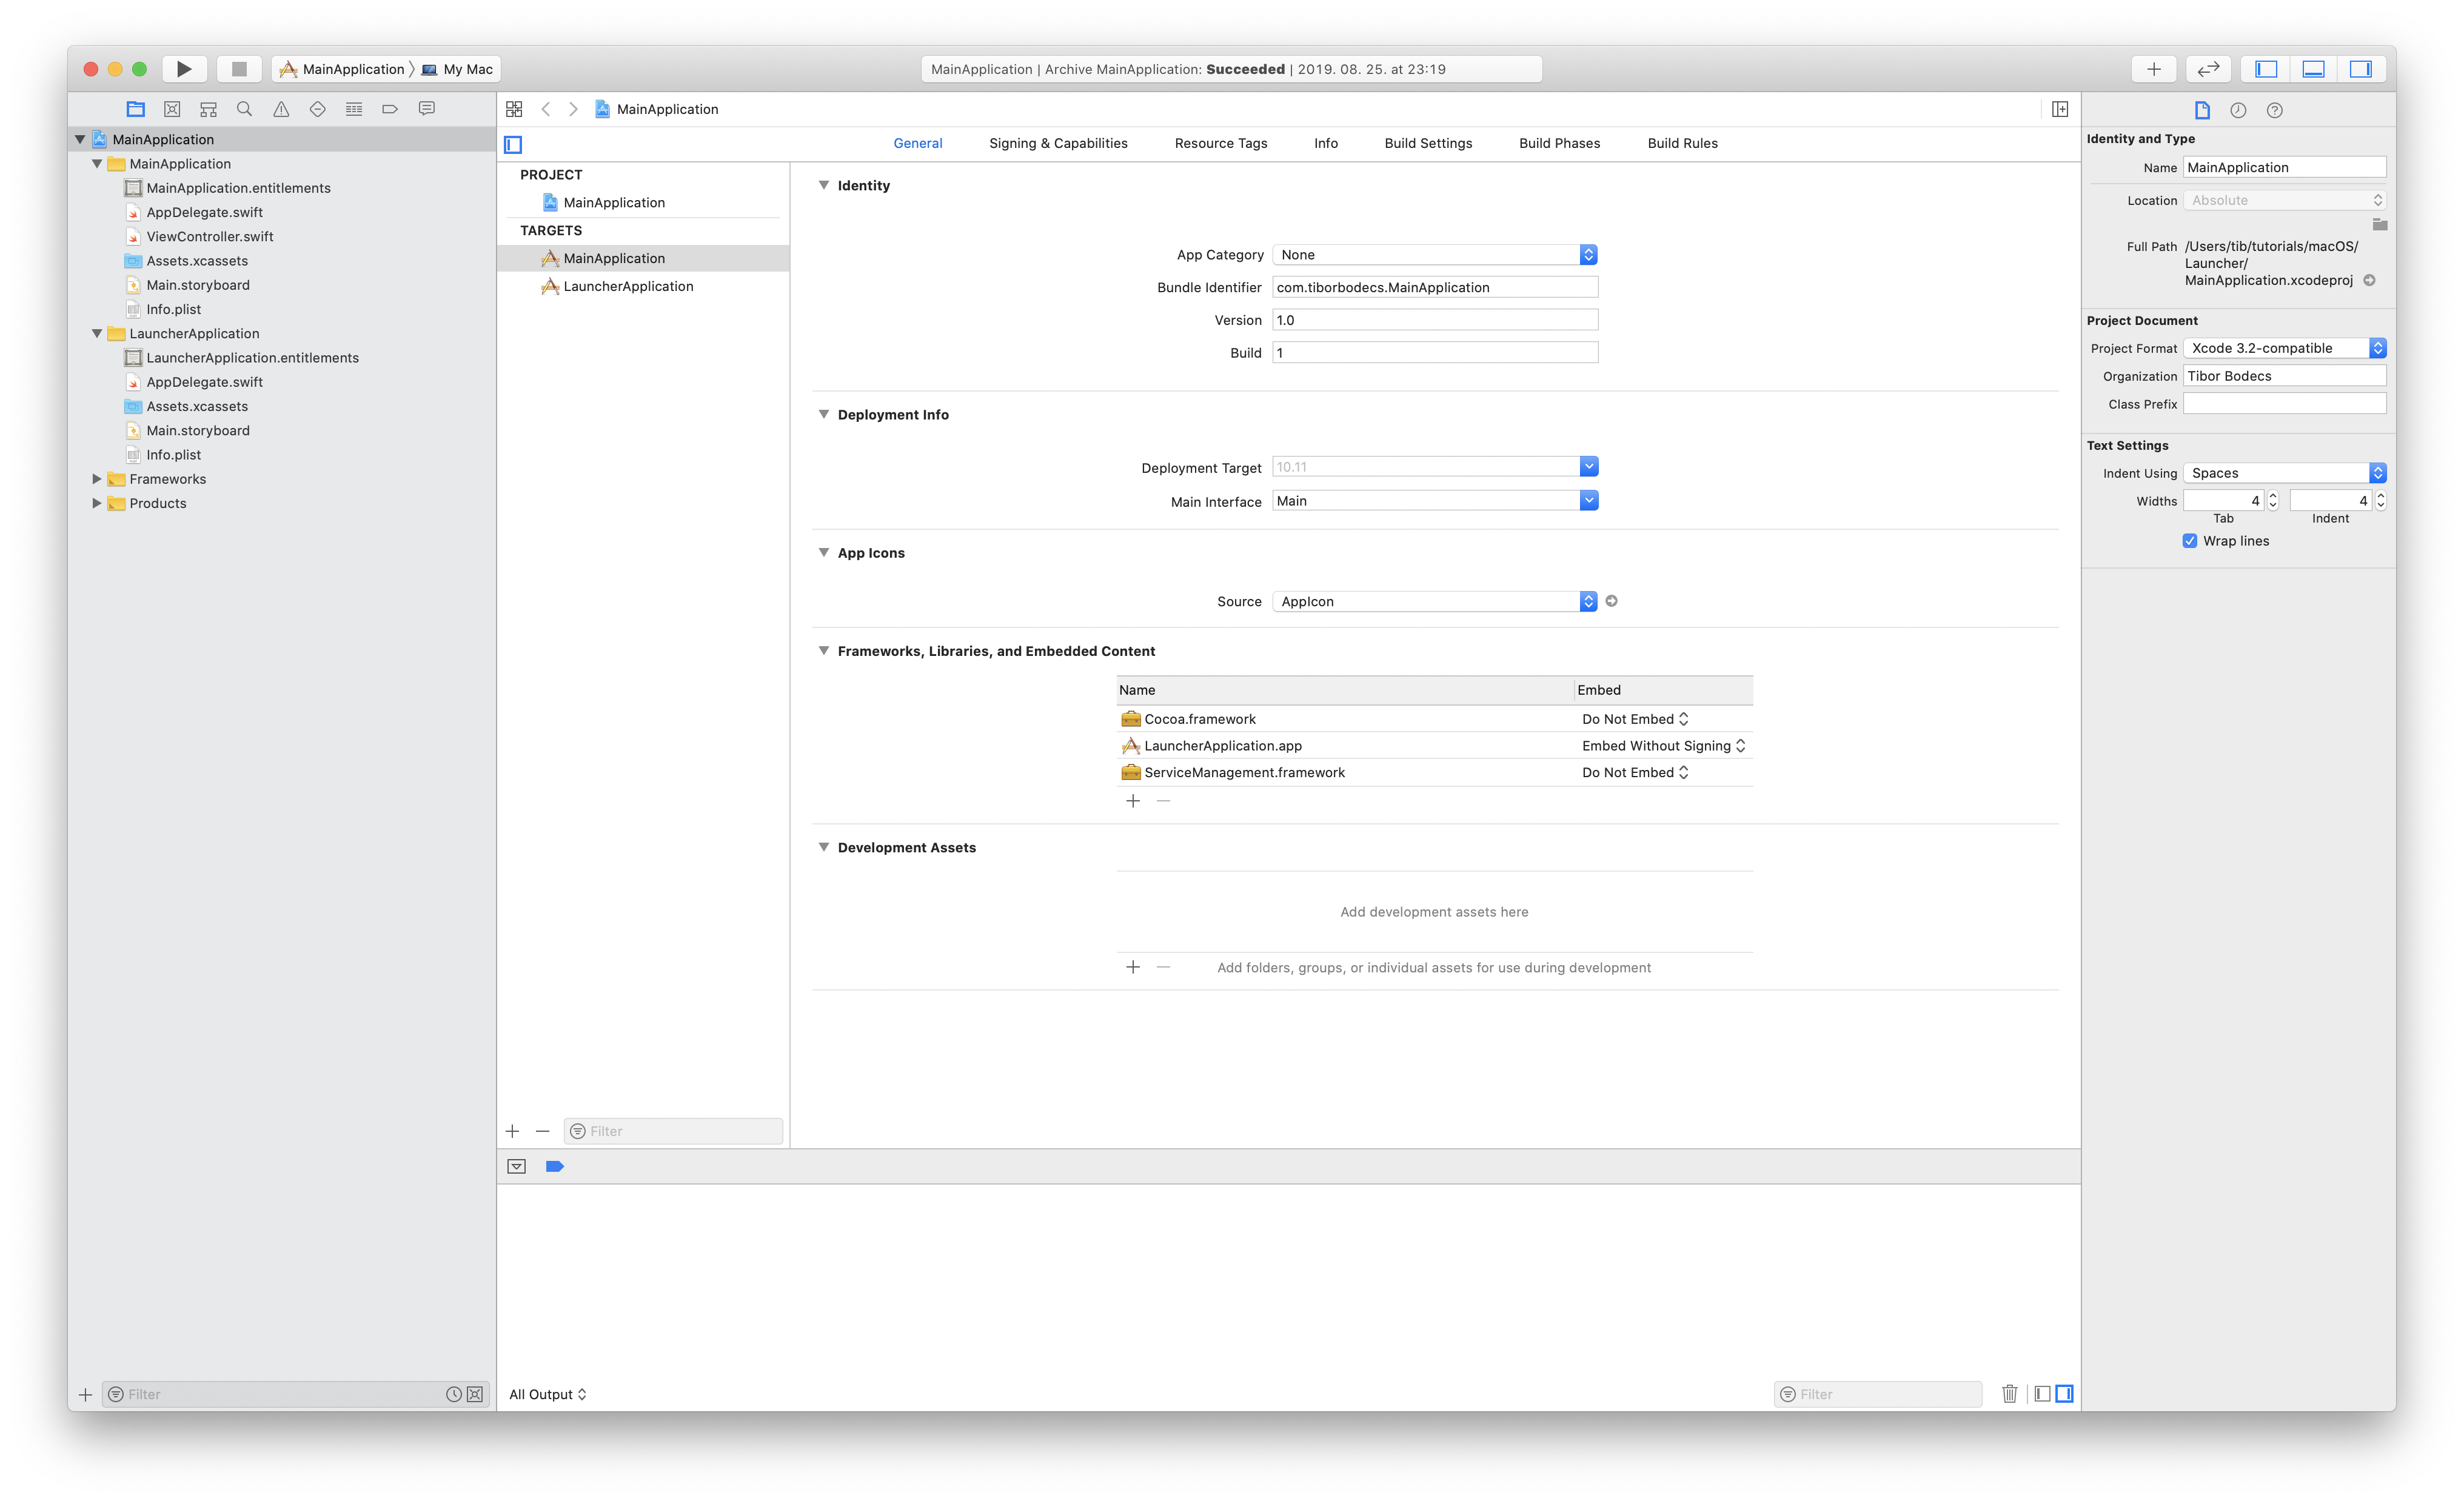
Link the ServiceManagement.framework to your main application and double check that the launcher app is embedded into your main application.
From the LauncherApplication‘s storyboard file delete your window and your view controller, also you can remove the ViewController.swift file from this target. This is a background app after all, so we don’t need these stupid things to lay around.
Creating the launcher programmatically
Somewhere in your main application you have to register your launcher application’s identifier. When your main application starts you have to kill the launcher application if it’s still running. You can do this by sending a notification to that specific app with the NSDistributedNotificationCenter class.
import Cocoa
import ServiceManagement

extension Notification.Name {
    static let killLauncher = Notification.Name("killLauncher")
}

@NSApplicationMain
class AppDelegate: NSObject {}


extension AppDelegate: NSApplicationDelegate {

    func applicationDidFinishLaunching(_ aNotification: Notification) {

        let launcherAppId = "com.tiborbodecs.LauncherApplication"
        let runningApps = NSWorkspace.shared.runningApplications
        let isRunning = !runningApps.filter {
            $0.bundleIdentifier == launcherAppId
        }.isEmpty

        SMLoginItemSetEnabled(launcherAppId as CFString, true)

        if isRunning {
            DistributedNotificationCenter.default().post(
                name: .killLauncher,
                object: Bundle.main.bundleIdentifier!
            )
        }
    }
}
In the launcher application you have to start your main application if it’s not running already. That’s it. You should also subscribe for the notifications from the main app to terminate if the launcher is not needed anymore.
import Cocoa

extension Notification.Name {
    static let killLauncher = Notification.Name("killLauncher")
}

@NSApplicationMain
class AppDelegate: NSObject {

    @objc func terminate() {
        NSApp.terminate(nil)
    }
}

extension AppDelegate: NSApplicationDelegate {

    func applicationDidFinishLaunching(_ aNotification: Notification) {

        let mainAppIdentifier = "com.tiborbodecs.MainApplication"
        let runningApps = NSWorkspace.shared.runningApplications
        let isRunning = !runningApps.filter {
            $0.bundleIdentifier == mainAppIdentifier
        }.isEmpty

        if !isRunning {
            DistributedNotificationCenter.default().addObserver(
                self,
                selector: #selector(self.terminate),
                name: .killLauncher,
                object: mainAppIdentifier
            )

            let path = Bundle.main.bundlePath as NSString
            var components = path.pathComponents
            components.removeLast()
            components.removeLast()
            components.removeLast()
            components.append("MacOS")
            components.append("MainApplication") //main app name

            let newPath = NSString.path(withComponents: components)

            NSWorkspace.shared.launchApplication(newPath)
        }
        else {
            self.terminate()
        }
    }
}
That’s it, we’re ready to launch. Export your main application and here is the most important thing: code sign it with your Developer ID. Start it, close it, log out and back into the system. Hopefully your main application will be running again.